Monday, January 16, 2012

Oven-Roasted Tomato Relish

If you are like me, you get sick and tired of buying tomatoes in bulk at Costco and struggling to eat them before they get old and wrinkly.  Well fret no more, friends.  Your days of throwing away old tomatoes are over!!! I have recently discovered the best trick to using old tomatoes -- slow roasting them until they become a decadent and delicious relish or pasta sauce!  Simply dice the tomatoes, mix them with minced garlic (as much as you like), drizzle with olive oil and balsamic vinegar, add dried herbs, roast at 400 degrees for approximately 45 minutes, stirring occasionally, and voila!  You have concocted an easy, delicious, healthy, and nutritious relish that is delicious on top of chicken, steak, pork, salmon, pasta, tacos, salad -- the possibilities are endless!  I have made this relish numerous times, and I experiment with different spices each time.  I would suggest using italian herbs, such as basil, oregano, and parsley; an italian seasoning blend is good, too.  Unfortunately I do not have specific measurements to use as I have had different sizes/amounts of tomatoes each time I have made it.  This is very simple to make, and all the ingredients are pretty much "to taste" and depend on your specific pallet.  Don't be scared to experiment!!  Roasting the tomatoes gives them a super nice flavor, and the relish/sauce freezes very well.  So, enjoy not wasting tomatoes!!

I used about 1/2 container of grape tomatoes from Costco the first time I made this.  I left the tomatoes whole, and I added dried basil, olive oil and balsamic vinegar. In using this method, the tomatoes created more of a sauce which I used on pasta.  In the pictures below, I diced up two roma tomatoes, added approximately 1 teaspoon minced garlic, drizzled with olive oil and balsamic, and added a few shakes of italian seasoning. I am planning on using it on top of my leftover Potato and Onion Frittata for breakfast tomorrow.  Bon appetit :)
After about 20 minutes of roasting -- remember to take it out and stir!!

The final product -- num :)

Pork Loins with Caramelized Pears (You could use chicken....)

I ended up coming down with a gnarly cold this week.  I pretty much stayed in bed most of the weekend; however, my wonderful friend, Scott, helped me assemble my new treadmill!  I am feeling as though 2012 truly will prove to initiate a healthier, slimmer, better eating KK.  Additionally, I got to cook quite a bit, which is highly therapeutic to my current life situation.

Day 2 of my back-to-cooking weekend:  Pork Loins with Caramelized Pears.  I got this recipe from Taste of Home's Simple and Delicious magazine.  The original recipe called for chicken breasts, but I used pork loins since I purchased a super pack of them this weekend.  It turned out fantastic!  Pears are probably my favorite fruit, and I've mentioned my passionate love for onions.  The pork turned out incredibly moist and flavorful, and I could see how chicken breasts would be equally delicious.  The original recipe also says apples can be used in lieu of the pears -- but in my opinion, why would ANYONE avoid using pears?!?!  I highly recommend this recipe to everyone -- whether you prefer challenging yourself in the kitchen or limiting yourself to boxed mac 'n cheese.  If you can slice, measure, stir, and turn, you can definitely create this masterpiece for the mouth.  I actually 1/2'd this recipe since I was only feeding myself, and I found all the ingredients very easy to cut in half.  I served this dish with a side salad, but it would also be delicious with long grain rice.  Enjoy :)

Pork Loins with Caramelized Pears
Serves 4
4 boneless pork loin chops (or 4 boneless skinless chicken breast halves)
1/2 teaspoon salt
1/2 teaspoon pepper
3 tablespoons butter
1 medium red onion, halved and thinly sliced
2 medium pears, thinly sliced
2 teaspoons brown sugar
1/2 cup balsamic vinaigrette dressing (I used Light House)
1/2 teaspoon dried thyme

Sprinkle pork (or chicken) with salt and pepper.  Brown pork in butter in a large skillet -- approximately 3-5 minutes per side).  Remove and keep warm on a plate covered in tinfoil.  Saute onion in the same skillet until tender.  Add pears and brown sugar, and cook 3 minutes longer, turning occasionally.  Stir in vinaigrette and thyme.  Return pork to skillet.  Bring to a boil.  Reduce heat and simmer uncovered over medium-low heat for approximately 20 minutes, turning pork every 5 minutes or so.  (If using chicken, simmer uncovered 6-10 minutes, turning chicken occasionally).  Slightly cut into the thickest part of the meat prior to serving to ensure the meat is white and no longer pink.  Serve meat topped with caramelized pears.

Skillet Gnocchi with White Beans and Spinach

I had a wonderful weekend :)  And, it's actually starting to look like January in Billings!  It has been snowing (finally) since last night, and I couldn't be more content on a Martin Luther King day.  I treated myself to leftover Potato and Onion Frittata topped with sauteed bell peppers for breakfast.  Leftover eggs always kind of freaked me out, but this dish could not have reheated better!  I look forward to indulging in my last piece tomorrow morning before work.

I discovered one of my new favorite vegetarian meals on Friday -- Skillet Gnocchi with White Beans and Spinach.  Not only is this dish incredibly healthy, inexpensive, and easy, the combination of flavors complement each other so well and literally form a culinary orgasm in your mouth.  Seriously.  I take advantage of cooking with spinach as much as possible as it is a powerhouse of nutrition -- loaded with Omega 3 fatty acids and tons of vitamins.  I love using beans as a protein, and pairing them with spinach and gnocchi (my Mom's fave) is a combination that I will try again and again!!  Although I would like to try making gnocchi from scratch, I used store-bought gnocchi, which only takes about 5 minutes to cook.  My roommate, Megan, and I lost our minds over this dish.  She primarily eats vegetarian dishes, and she was in awe of this meal.  In fact, although she doesn't fancy herself a cook or play with recipes very often, she is dead-set on making this dish on her own!! I couldn't be prouder :)  Enjoy, and bon appetit!!


Skillet Gnocchi with White Beans and Spinach
Serves 6, 1 cup = 307 calories!!
1 medium yellow onion, chopped
1 red or orange bell pepper, ribs and seeds removed, chopped (yellow would be fine, too, but I like using red or orange for aesthetic value)
1 tablespoon olive oil
2 garlic cloves, minced
1 package (16 ounces) potato gnocchi, boiled
2 tablespoons butter
1 package (6 ounces) fresh baby spinach
1 can (15 ounces) white kidney or cannellini beans, rinsed and drained
1 can (14.5 ounces) Italian diced tomatoes, undrained (I used diced tomatoes with basil and oregano)
1/4 teaspoon pepper
1/2 cup shredded part-skim mozzarella cheese
3 tablespoons grated parmesan cheese

In a large skillet, saute onion in oil until tender.  Add garlic, and cook 1 minute longer.  Meanwhile, cook gnocchi according to package directions (you usually boil in water for approximately 5 minutes -- gnocchi will float to the surface when cooked).  Add 2 tablespoons butter to skillet.  Remove gnocchi from water with a slotted spoon and add to the skillet.  Cook and stir for 5-6 minutes or until gnocchi is golden brown; I like it to get a little seared and crispy.  Stir in spinach, and cook until spinach is wilted (approximate 3-5 minutes).  Add the beans, tomatoes, and pepper; heat through.  Sprinkle with the cheeses, and cover and remove from the heat.  Let stand for 3-4 minutes or until cheese is melted.
Right after I added the gnocchi to the dish.  Let those babies sear and get a bit crunchy!!

A few minutes after sprinkling with cheese.  Scoop right out of the skillet to serve!

Saturday, January 14, 2012

Potato and Onion Frittata

The holidays were great, and not going to lie -- I ate waaaay too much food and drank entirely too much wine.  Regardless of how much fun I had eating, drinking, and playing with miss Ivy, it feels fantastic to be home cooking again :)  One of my New Year's resolutions is to eat (and cook) more often at home.  I've been eating out way too much, and eating at home more often will help fatten my wallet and slim my waist.  I, like most people, would like to get in better shape, and eating better goes hand-in-hand with that goal.  I have decided to menu plan on a weekly basis to help me both save money and be better prepared to cook when I get home from a tiring day at work.

I woke up this morning excited to head to the grocery store and make breakfast.  I've been craving egg frittata!  Walking out to my car, I encountered a horrible surprise; some jackass threw a rock through my driver's side window :(  I was furious.  Thankfully, my car is already fixed (!), and the roomie let me take her car to the grocery store, so everything worked out!

For breakfast, I made us a potato and onion frittata and sauteed bell peppers and onions.  The frittata turned out so lovely!! This is only my second time tackling a frittata, and I couldn't be more pleased with the way it turned out this morning.  I basically used one recipe from the Great Food Fast Everyday Food cookbook and another from a Simple and Delicious Taste of Home magazine.  Both recipes sounded great, although they used somewhat different techniques and ingredients.  I took ideas from both recipes, and my delicious love child was born.  The Everyday Food recipe advised me to use a non-stick broiler safe skillet, which I did not have.  Instead I used my cast iron skillet, which gave the frittata a crunchy bottom which I found quite delightful.  This breakfast turned out wonderful and healthy!  For a healthy side dish, I sauteed one red and one yellow bell pepper with 1/2 sliced red onion in 1 tablespoon olive oil and approximately 1 teaspoon minced garlic.  This breakfast was so enjoyable on a day that started out poorly.  I will definitely make this frittata again, and I will continue to experiment with different vegetables and spices to add to it. Enjoy!


Potato and Onion Frittata
Serves 4
2 T olive oil
1 large sweet onion, halved and thinly sliced
1 large baking potato, peeled and thinly sliced
1/2 t dried rosemary, crumbled
Coarse salt & fresh ground pepper
8 large eggs
1/2 C lightly chopped flat-leaf parsley leaves
2 T shredded cheddar cheese

In a medium skillet (10-inch), heat 1 T olive oil over medium heat.  Add the onion, potato, and rosemary; season with salt and pepper, and toss to combine.  Cover the skillet, and cook for approximately 10 minutes; uncover.  Cook, tossing the mixture occasionally, until the onion and potato are tender, about 5 minutes.  Scrape browned bits of the bottom of the pan as you toss the mixture.  Meanwhile, in a medium bowl, whisk together the eggs, parsley leaves, 3/4 teaspoon salt, and 1/4 teaspoon pepper.  Heat the broiler on high with a rack set 4-6 inches from the heat.  Add the remaining tablespoon oil to the vegetables in the skillet and toss to coat.  With a spatula, press the potato and onion mixture to the bottom of the skillet to form the crust.  Pour the egg mixture into the skillet.  Cook on the stove, over low heat, lifting the mixture a few times around the edges with a spatula to let egg flow underneath.  Continue cooking until the frittata is almost set in the center, about 10 minutes.  Place the skillet under the broiler; broil until the frittata is set and the top is lightly golden, about 3 minutes.  Take skillet out of the oven, top the frittata with 2 tablespoons cheddar cheese, and let stand for five minutes.  Run a clean spatula around the edges to loosen, cut pie-shaped wedges, and serve.  You could also loosen the entire frittata and slide it onto a plate prior to cutting the pieces. 


Monday, December 19, 2011

Crock Pot French Onion Soup


I absolutely love onions.  They are far and away my favorite vegetable.  Onion praise to follow.  I have started a mini garden of green onions in my windowsill.  I learned on Pinterest that green onions regrow quite easily; simply cut off the portion you intend to use -- approximately 2-3" from the root -- and stick the root end in a glass of water covering approximately 1" of the onion.  Place in a windowsill, and voila.  They actually grow!  So exciting.  I change the water about every other day, and I also rinse off the root ends to keep my green kids happy.  Although green onions are quite divine, my onion passion truly lies in the sweet yellow variety.  I could, and usually do, add onions to nearly every meal I cook.  They are a powerhouse of antioxidant goodness.  Ellie Krieger taught me the antioxidants are let out once, and only when, you heat the onions.  So cook those babies!!  I guaran-damn-tee it that I will end up marrying an onion lover; if you don't love onions, you won't be dining in my life kitchen :)

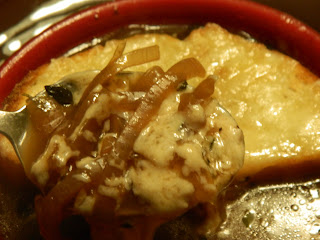
Being an onion aficionado, it should come as no surprise that I have an open, healthy relationship with french onion soup.  I. Mean. Really.  Caramelized onions, broth, wine, bread, and cheese.....makes me feel like I need a cigarette just thinking about it.  (Not that I smoke, but you know what I mean).  I've dabbled with a few recipes within the past few years, and I order it frequently in restaurants.  Ls & Gs, not until tonight have I found the perfect french onion soup recipe.  It is absolutely mouth-watering, easy, and PERFECT.  Not to mention -- YOU MAKE IT IN YOUR CROCK POT.  It doesn't get better than what my taste buds just experienced, loves.

I tweaked the recipe I found a little bit, and I think all tweakings worked out for the absolute best.  The main difference in my soup is that I added a little bit of red wine.  Let's get real -- wine makes everything better.  Next time I will definitely buy taller, more round, bread (you'll see what I mean when you see the pic below).  I have learned this evening that it is very important, presentation-wise, to have a piece of bread that covers as much of the surface of the soup as possible; that way, the cheese stays on top and browns instead of sinking in the soup as mine did.  Regardless, the taste was to die for, and I will absolutely, positively be making this dish again.  Enjoy :)


Crock Pot French Onion Soup
Makes a giant pot, about 8-10 servings 
4 medium sweet onions, thinly sliced
3 garlic cloves, minced
4 T butter, cut into approximately 6ish cubes
2 T balsamic vinegar
2 T brown sugar
3 T flour
8 ounces of beer
58 ounces beef stock
6 ounces red wine
2 T fresh thyme leaves
1/2 t black pepper
1/2 t salt
french bread
gruyere cheese, grated

Set your crock pot on high.  Add the onions, garlic, brown sugar, butter, salt, and balsamic vinegar and mix until combined.  Cover and let cook for 60 minutes, stirring occasionally, until onions are a bit caramely and brown on the edges.  Add the flour, stir thoroughly and let sit for 5 minutes .  Add beer, beef stock, wine, thyme, salt and pepper.  Turn heat to low, cover, and cook for 6-8 hours (I cooked for 8).

Before serving, cut bread into approximately 1-1 1/2" slices.  Fill oven-proof soup bowls to the top, cover with a slice of bread, and sprinkle grated cheese over top.  Set under the broiler for 2-3 minutes or until cheese is bubbly and golden brown.  Serve and enjoy!  (Watch yourself, bowls will be hot).

Sunday, November 13, 2011

Balsamic-Glazed Butternut Squash

I initially made this dish with my Hoison Glazed Salmon.  This dish is completely amazing.  I have made it twice since my initial love-at-first-taste experience.  I did not add vegetables to the squash dish, and to be honest, it truly doesn't need it.  The caramelized onions are absolutely divine, and I will definitely be making this dish again and again in the very near future.


Cooking time, 45 minutes.  Serves 4 as a side.

1 medium sized butternut squash, peeled and diced
1 medium zucchini, peeled and diced (I omitted this because I didn't have one.  Feel free to add other vegetables you have laying around, i.e. carrots, potatoes)
1-2 Tablespoons olive oil
1/4 teaspoon salt
1/4 teaspoon ground pepper
1 large sweet onion, thinly sliced
1 Tablespoon olive oil
1-2 Tablespoons balsamic vinegar

Preheat oven to 400 degrees.  Peel squash, remove seeds with an ice cream scoop, and dice into bite-sized pieces.  Place squash in a casserole dish and toss with other vegetables (if using), olive oil, salt and pepper.  Roast for 20-30 minutes, until fork tender.  Tast and adjust seasonings as needed.

While your squash roasts, caramelize your onions.  Heat a tablespoon of olive oil in a medium saucepan over medium heat.  Add sliced onions and stir until softened, about five minutes.  Lower heat to low-medium low, and add in 1 tablespoon balsamic vinegar.  Stir, and allow to cook for another 5-10 minutes.  After this time, check your onions, and if you really like balsamic vinegar (like I do), you can add another tablespoon.  Continue to stir occasionally for another 10 minutes or so, until the onions are nicely caramelized and the balsamic vinegar has reduced.

When your butternut squash is ready, toss it with the balsamic glazed onions.  Taste, and adjust seasoning as necessary.

Southwestern Salad with Cilantro Lime Vinaigrette

I served this salad with my Vegetarian Three-Bean Chili.  It would be impossible for me to accurately praise this salad.  The cilantro lime vinaigrette is one of the most delicious dressings I have ever tasted.  I was nervous at first because of the cilantro to liquid ratio; the dressing turned out somewhat thick and absolutely delicious.  I found pumpkin seeds at World Market, but those of you who are over achievers could roast your own.  The girls absolutely loved this salad, and I will definitely be making it again and again! 

Ingredients
Salad:
Romaine lettuce
handful of grape tomatoes
2 green onions, sliced
2 bell peppers (any color), diced
1/2 c black beans (I omitted the beans since I served this with bean-packed chili)
1/2 c frozen corn, thawed
1 T toasted pumpkin seeds
1 avocado, diced
2 T cotija cheese
Cilantro Lime Vinaigrette

In a large salad bowl, add chopped lettuce, tomatoes, green onions, avocado, bell peppers, black beans, corn, pumpkin seeds and cheese.  Top the salad with the vinaigrette and enjoy!

Cilantro Lime Vinaigrette:
1/2 c chopped cilantro
1/4 c olive oil
2 T lime juice (fresh, or store-bought, I used store-bought and it was great)
1 T red wine vinegar
salt and pepper to taste
1 clove garlic, minced
1/2 t oregano

Blend all ingredients together in a blender.  Let the flavors mingle for at least 30 minutes before serving. 

Caramelized Brussels Sprouts

I found the recipe for the brussels sprouts on Pinterest.  I cannot describe how wonderful this dish turned out!  I omitted the nuts from the brussels sprouts -- mostly because I was lazy and didn't want to toast them.  The sprouts have the perfect mix of veggie and sweet.  The texture turned out wonderfully.  I served this with my Hoisin Glazed Salmon.  Although all three dishes in that meal were a little sweet, the flavors actually turned out well together.  I would highly suggest this side dish with steak or chicken.  Enjoy!!


Serves approximately 3-4 as a side.

12-14 large brussels sprouts
1 Tablespoon olive oil
1 glove garlic, minced
pinch sea salt
2 Tablespoons brown sugar
1/4 cup roughly chopped pecans or walnuts, toasted (optional)

Cut off stems and slice each brussels sprout very thin until you have a mound of feathery brussels sprout ribbons.  Heat the olive oil over medium high in a large skillet and saute the garlic for 30 seconds.  Add the brussels sprouts and continue sauteing for another 4-5 minutes, until bright green and tender (or longer if you like them more well-done, like me).  Add the sea salt and brown sugar and toss together.  Finish by adding the toasted nuts.

Cheddar and Scallion Cornbread

The cornbread was good, but it is traditional Texas cornbread in that it is not very sweet.  This was my first time making cornbread from scratch, and it is noticeably less sweet than store-bought mixes.  However, I thought it was delicious!  I made this to accompany my vegetarian three-bean chili.  As I do with chili, I tore the cornbread into bite-sized pieces and sprinkled it over my chili.  It was delightful :) 


Ingredients
1 1/4 c cornmeal
3/4 c flour
1 T sugar
2 t baking powder
3/4 t salt
1/2 t baking soda
1 c cheddar cheese, grated
3 green onions, thinly sliced
2/3 cup milk
2/3 c buttermilk
2 large eggs
3 T unsalted butter, melted

Preheat oven to 425 degrees.  Generously grease a 9" round cake pan.  In a large bowl, whisk together cornmeal, flour, sugar, baking powder, salt and baking soda.  Gently fold in the grated cheese and green onions, mixing until combined.  In another medium bowl, whisk together the milk, buttermilk, eggs and melted butter.  Add the wet ingredients to the dry ingredients, whisking until just combined.  Bake until a toothpick inserted into the center comes out clean, about 18-20 minutes.

Maple and Brown Sugar Pork Tenderloin in the Crock Pot

One word:  WOW.  This dish was absolutely delicious and inspiring.  As I've stated, I am in love with my Crock Pot; however, I had no idea something this amazing could be birthed from my shiny red girl!  The pork was tender and moist!  The sauce was rich, sweet, and incredibly sinful!  To be honest, I don't know if I will venture out and try another recipe after tasting this phenomenal piece of Crock Pot magic.  Okay, that's a false statement.  But this recipe 100% exceeded my expectations and took me to a whole new level of Crock Pot appreciation.  Since I was only cooking for one, I cut the pork loin in half and froze the second half for another day (I will absolutely be using it in this same recipe in the near, near future).  I actually purchased a 2-lb tenderloin instead of two 1 pounders.  I served this with my favorite side dish, balsamic-roasted butternut squash , and steamed asparagus.  The meal was filling, rich, healthy, and most importantly, so easy to make!  The only suggested alteration would be to double the sauce if you are cooking 2 pounds of tenderloin; I only cooked 1 pound, and there was just enough sauce for that amount of meat.  This is a must-make dish, and it is sure to please everyone in your household.  Enjoy!!


Ingredients
2 pork tenderloins, about 1 pound each
salt and pepper
1 small clove garlic, minced
4 T country-style dijon mustard (I used Grey Poupon)
2 T honey
2 T brown sugar
1 T balsamic vinegar
1/2 t dried thyme leaves, crumbled
1 T maple syrup
1 T cornstarch
1 T cold water

Wash and trim the pork and pat dry.  Sprinkle lightly with salt and pepper.  Place pork into the Crock Pot.  Combine garlic, mustard, honey, brown sugar, vinegar, thyme and syrup; pour mixture over the pork.  Turn pork a few times to coat thoroughly.  Cover and cook on LOW for 7-9 hours, or on HIGH for 3 1/2 - 4 1/2 hours.

Remove pork to a plate, and cover with foil to keep warm.  Pour the juices into a saucepan and bring to a boil over medium heat.  Simmer for 8-10 minutes, or until reduced by about 1/3.  Combine the cornstarch and cold water, and whisk into the reduced juices and cook for 1 minute longer.  Serve pork sliced with the thickened juices.